Search This Blog

Thursday, April 21, 2011

Planting for Privacy-Part 1


We have transformed our front yard considerably in the last 3 years. Read about the first few stages of transformation here. (Follow the other articles with the "Front yard" label to walk along time)What started of as a dense overgrown brush area has really been transformed into a nice little rose garden. Living on one of the busiest streets in the area poses a lot of challenges. One of the things we have struggled with, is to bring in some much needed privacy in the front yard for sight and sound proofing.


The simplest solution was to build our fence tall enough but the city wouldn't let us do it for "consistency" and "safety" purposes. Driving around our neighborhood I saw a lot of houses with Oleander bushes and Red Tip Photonias that appear to have been plucked straight out of the "Giant's Island" from Gulliver's travels. This got me thinking if I could sneak through the height requirement by erecting a green fence.


The front of our property faces east on a rectangular lot and the main attraction are our 4 giant live oak trees which I am really proud of. However, putting down any plant under these oak trees along the fence would require direct irrigation in the drip line of the oaks which according to many a tree guru is a big NO NO. After much thought and reluctance we decided to go with "Oak friendly" Oleanders for most of the front yard. You can read more about our attempt here. Our strategy has been to tell them to "Go Fish" for water but it isn't working well. Its time to give them some drip irrigation at least for the next year or two until they establish themselves.


Towards the north-east corner of the property, we get a good amount of afternoon sun, where we have a majority of our roses planted alongside that fence-line. In the same area, between the roses, right up against the fence, I tried sowing some seeds of the Cathedral Bells, The Black Eyed Susan vine and Passion Fruit last year. Even the ones that emerged were promptly killed by the frost.


As I was wondering what to do little did I realize that the answer was right in front of my eyes. In late fall we saw this lovely winter Jasmine plant at Costco and picked it up. It was planted into one of our ceramic planters right outside our front door and has almost doubled in size in the last 6 months (a lot of it during winter). Add to it the fact that it is evergreen, I decided that it would be my choice of flowering vine in the front yard. Plus this complements well with the roses since this would provide fragrance in late winter early spring and the roses during late spring, summer and fall. The flowers are so fragrant and delicate...


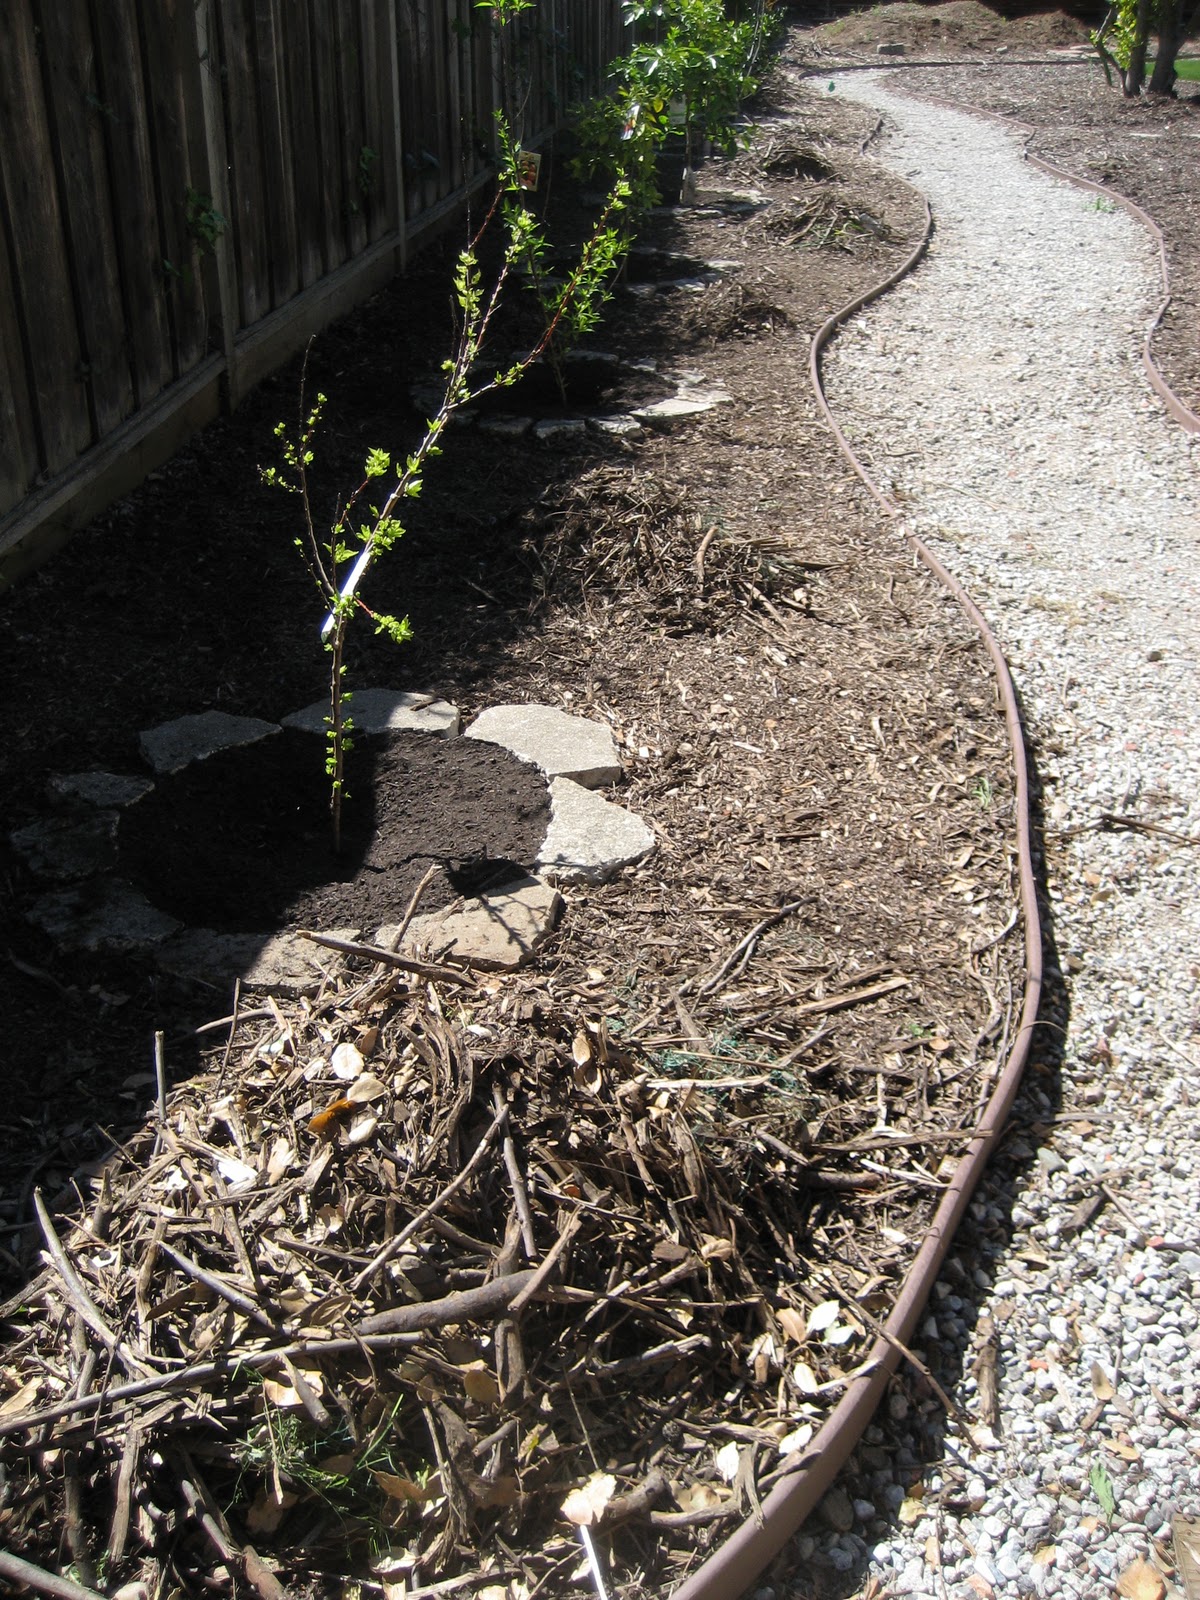
So this year, as soon as i saw these Winter Jasmines at Costco, I pounced on them again and got 6 more home. Immediately, last weekend we got them into the ground right up against the fence.


Going by the growth in the first jasmine (the corner one in the photo above), in a few years the coverage should be pretty dense. However, they may need a bit of direction once in a while by some careful wrapping of the new shoots. If you have suggestions for other such trellising vines that remain evergreen and would give good coverage, please do let me know.

More pictures on the trellis project are coming up shortly.

Our Eco-lawn experiment-Year 2


In the spring/ summer of 2010 we installed Eco-lawn in our front and back yard. Read our last update on the grass  here.

The Eco-lawn did fabulously well in winter, there was just very minimal browning with the grass going dormant in winter. Early in April 2011 we removed all the weeds that had sprung up and re-seeded the lawn.


You can see the extent of browning here.


Now that the heat has started to pick up here, we would be turning on the sprinklers. We will update the progress on the Eco-lawn performance and water requirements now that it is "established" well.

Reborn

I think that no matter how old or infirm I may become, I will always plant a large garden in the spring.  Who can resist the feelings of hope and joy that one gets from participating in nature's rebirth? 


A couple of weeks back I spotted this small pack of Tomato seedlings growing in an empty pot that is near one of our planter beds. I am not sure if these are seeds that were planted last year but never germinated and were dumped into an empty pot or they are seeds from the many ripe tomatoes that we could not harvest in time. 

These have weathered the elements and are doing fabulously well. And here I am babying seedlings in soil blocks on a heat mat with grow lights.


Maybe I should just plant my seeds outside directly.

Wednesday, April 20, 2011

Bulbs 2011

We went crazy buying bulbs in 2010 and breaking the bank. We also set them out in bad locations (and the moles/ voles didn't help either. Read about the Calla Lilies here and here) As I was looking for the pictures on our 2010 bulbs I realized that I never posted anything about the lovely Dahlias, the Tulips, Hyacinthus and Asiatic Lilies that were planted in 2010.

In 2011, we learnt from our mistakes, and we got only the ones we really liked and thought through our decision on where to plant them.


But then again....we were lazy. The bulbs were languishing in the garage for few months and them it finally struck me sometime last weekend that I needed to plant them before it was too late. The bulbs were actually growing through the plastic bag in which they were packed.


One of my favorites from the 2010 garden were the Asiatic Lilies that were extremely fragrant and were very long lasting when cut and put together in a vase. We had decided to plant them in our newly built recycled concrete planter bed (read here).


These are the bulbs that I bought in 2011. We picked up every variety of Lily I set my eyes on.


After a week of being in the ground, they seem to be doing well.....I guess I did not cause too much harm by delaying my planting.

The making of a herb garden

One of my visions has been to convert our Camellia territory (read about the move here) into a herb garden. The space is about 12 ft long and about 4 ft wide.


I had saved up these pieces when the new fence on the north side was being installed. The fence installers were going to just dump these into the trash.


We still needed to spend some dough to get the other supplies for the planter bed.

The first part i.e. the frame was built with 2x4 's attached to 4x4 posts with some long galvanized lag screws.


We then nailed the recycled fence board pieces onto the structure with the nail gun, and 1 1/4 finish nails.


Now that the bed is up and ready, we have been thinking of adding a top trim onto the box. A 2x4 trim on all 3 sides and a 2x12 trim on the side that is closer to the patio with some supports nailed to the 4x4 posts. This will function like a bench area where one can sit down and tend to the herbs.

Tuesday, April 19, 2011

Mulberry

O, the mulberry-tree is of trees the queen!
Bare long after the rest are green;
But as time steals onwards, while none perceives
Slowly she clothes herself with leaves—
Hides her fruit under them, hard to find.
    *    *    *    *    *
But by and by, when the flowers grow few
And the fruits are dwindling and small to view—
Out she comes in her matron grace
With the purple myriads of her race;
Full of plenty from root to crown,
Showering plenty her feet adown.
While far over head hang gorgeously
Large luscious berries of sanguine dye,
  For the best grows highest, always highest,
  Upon the mulberry-tree.
        D. M. Mulock—The Mulberry-Tree.


It is spring.....and the Mulberry tree in our front yard is coming back to life


Growing up in south India with its tropical weather, the world "Mulberry" meant nothing more than a fun bush to go around as the more well-known (and badly fact checked) rhyme suggested. 

 Here we go round the mulberry bush,
The mulberry bush,
The mulberry bush.
Here we go round the mulberry bush
On a cold and frosty morning.
 
Berries were not a common occurrence at the neighborhood fruit stand. Then came our lesson on how silk is made thanks to silk sarees being an integral part of every south indian wedding or function. It had completely faded out of our memory until we came to our house. Even then we did not recognize the shaggy looking tree with a gnarly bark and branches that had been the result of bad pruning and neglect. 

We managed to prune it a little this fall, but to some extent the damage has already been done !I still see a lot of dead limbs that haven't shown any sign of life. I am hoping someone points me in the right direction on what I should be doing to preserve the only nice tree that came with our money pit.

In the meantime here is the picture from last year's Mulberry harvest that I am drooling over.


I am looking forward to the Mulberries this year......and I might even end up making some Mulberry preserves

Thursday, April 14, 2011

Mistakes....

I have been looking through my pictures trying to get them all in one place and organize them.

Looking back now, I realize all the mistakes we made in the last couple of years.

An 8 ft trellis for a Bean-Bush (read your seed packets)


Over planting Squashes (Almost 30 squash plants and we got a harvest of about 5)


Fresh wood chips on a tomato that was planted in a container (no wonder our plant was yellowing and didn't produce much fruit)


We have come a long way and I am happy to learn something new every year.

Rain


God made rainy days so gardeners could get the housework done. 


 It has been crappy ...on and off this past week. It rained  briefly, sometimes even hail in some places.  But overall cloudy, windy and cold spells have kept us indoors.


Divine Will


Meditation is not a means to an end. It is both the means and the end.


During one of my recent retail therapy trips I spotted this Buddha statue and figured that my tiny Japanese Maple might be a good spot. The hands nestled in his laps apparently suggests a meditative pose.


Mulching

In 2010 we had our friendly tree pruner deliver a couple of loads of wood chips to help us keep the weeds down. This was one of our first loads of wood chips.


We spread them around the yard, mainly the areas where we had nothing growing, and around our raised planter beds. They made a BIG difference. During the winter of 2009 we had serious issues with weeds popping up everywhere.

Now that we are working on adding more plants in the garden (maybe even flowers.....flowers from seeds), we have been working on removing the twigs that were a big part of the wood chips that got delivered. Since it was free stuff, I did not complain about the pieces being uneven. But now it means we have to get them all out.


It has been an extremely arduous task to say the least. We have close to 2 cu yards of decent sized twigs that are now piled up on the driveway waiting to be disposed. Maybe the next time around we should just order some mulch from our garden center and spare us the trouble of having to go through this clean up exercise.


Hanging Baskets

One of the design aspects that we put in when we re-designed our front yard was to add a place to put in some hanging baskets. You can read about that here.

Later in the summer of 2010 we managed to put up the baskets, install a spray irrigation system. The Lobelias and the "hanging basket mix" seeds that were planted germinated, but it was spotty. The baskets do not get a lot of sunlight, especially the ones in the back.

So I picked up a couple of Fuchsias and planted them in the baskets in the back. I also picked up all the volunteer Nasturtiums that emerged in the Tomato beds (from last years seeds) and planted them in my hanging baskets. I am hoping they will re-seed and be a little easy on ongoing maintenance.


Also, the coir basket liners had deteriorated completely in just one season. It did seem like a lot of ongoing maintenance in the long run. I had read about these "grow bags" concept online and was hoping to replace the coir liners with these grow bags. I managed to trim them and fit them in my hanging baskets.


Wednesday, April 13, 2011

Photinia update


We moved the RTP's (Red Tip Photinia's) that were near the foundation out near the front fence. (read here)

One of the plants died, but the rest survived and I am happy to report that they have been doing very well. I can see that they are forming the "red tips" i.e. the new growth and seem to be growing taller as well.


They are also sporting some pretty white flowers


The Camellias

This past weekend we worked on a project that has been on my wish list ever since we bought the house in April 2008.


Each of the Camellias are unique and bear very pretty flowers. Here are some


This is a picture from fall of 2008 when the pool demolition was in progress


We finally managed to dig out these Camellias and move them closer to the back fence. And now i am keeping my fingers crossed, and praying that they make it.


I haven't pruned them as yet, and hopefully they will all survive and take well to the new surroundings.


Plastic Planters

I love planters, and Costco has been a big contributor fueling that passion !

Their plastic planters are double walled and are much sturdier than the nurseries/ home improvement store ones. And at around $18 a piece they are at a good price point.

I picked up these last year i.e. 2010


The ones from 2011 are much nicer looking in my opinion. I have not started planting in them. They house the old plants that we dig up when we are relocating them around the yard.


More retail therapy

Art on the walls

After 2 years of sitting around in the garage....this clearance aisle find finally went up near our backyard concrete patio.


More on this "test garden" area shortly

Friday, April 8, 2011

Black Gold


Over the last 3 years that we have lived in this place, we have added almost 70+ cubic yards of compost into the predominantly clayey soil (I would rather call it debris).

A big chunk of it went to the backyard when we closed the pool and started our raised vegetable planter beds.


 Our bulk compost supplier has been Mountain View garden center. We have had them deliver a full truckload of compost on more than one occasion. We recently ordered a truckload (about 10 cubic yards) to add to our planter beds for this growing season and also to mix into the massive concrete retaining wall that we finished and the herb planter bed that we are building right now.


One of the nice things about living in an eco-friendly place like the bay area is the composting program that many cities offer. Ours is no different and therefore when we do not have a big project going on, we pick up free compost from the Sunnyvale SMaRT station for our regular needs.

Now that we are close to a steady state situation, we have been contemplating setting up our own composter at home, and maybe even a worm bin!!!! Vermicomposting would be all left to Guru!

Our home composting enclosure is all set to go. Hopefully we will finish installing it this weekend.


I put in the exclamation because my approach to gardening has a sense of dichotomy. While on the one hand I love digging around in the garden, tending to my plants, pulling out weeds for stress relaxation, on the other I have an unfounded, unbiased distaste for all things slimy. Though it may be justified for those slugs and snails, unfortunately my hate does not differentiate our best garden friend, the earthworm. Yes, I have to accept that I am a worm hater :( I wish there was a class to overcome this.

We have always segregated our degradable trash from the kitchen. Our local Costco in northern California has been carrying compostable trash bags for a while now. Even my parents in India have begun using these Biobags and add it to their compost pit that is in the yard.

I usually have my BioBag set up on my kitchen counter lining a plastic bowl. The biggest flip side is the fact that it attracts fruit flies very easily. On a recent trip to Marshalls I found a steel pail composter that was big enough to hold a decent amount of kitchen scraps, had a lid, looked nice and cost me only $14. The lid was perforated to allow the trash to breathe and not start decaying at the same time, the lid was fitted with a carbon filter to take out the bad odors. And the Biobag ensures easy cleanup and disposal (considering our diet is all vegetarian and we fill up our container in about 2-3 days).


Good find eh !......retail therapy rocks

Nature writes. Gardeners edit.


Taking a drive around our neighborhood you see these beautiful front yards and pavements lined with pretty yellow flowers. Draw close and you realize its the same weed that has been tormenting us by growing all over our yard. Below is a photo of it. Granted that this isn't like its ugly cousins with thorns and unsightly blooms but it slowly but surely takes over your yard. The one saving grace is that procrastination helps just a little as their yellow blooms are indeed pretty to look at.


I read somewhere that to be "certified" organic for a vegetable patch, there has to be a chemical free buffer zone around your garden for 50 yards all around. Keeping this in mind we have been trying hard not to use any chemical methods (Roundup, etc.) and just do it the organic way, i.e. pull them out one by one. Doing this every day does help me take my mind off other things and is a great stress reliever. Not sure if my fellow gardeners feel the same. 

Over the past few years I have come to know my weeds quite well and even smile at  recognizing some of them along the free way during my commute to and from work. These are usually at least 5 feet tall, making me wonder if mine would be the same had I let them grow. 

I sometimes wish that Caltrans and city community works departments realize what they are doing. I find that the weeds are allowed to grow as much as they want through the entire wet season and flower and set seed. At this point they are asking to be disturbed so they can launch their seeds into the wind. Precisely at this time all community departments realize that the weeds are no longer adding to the beauty of the landscape and decide to come over with a large scale weeder on a tractor and take care of business: for the weed that is, sending them everywhere. Maybe I am the one who does not understand the plan. Maybe this is their cheaper alternative for green landscaping for 4 months of the year.

Our approach to weed management for the most part follows the age old saying "Prevention is better than cure". We were left with no other alternative as our neighbor decided to neglect his $$$$ yard (with sod and ornamentals) and let it become a test garden for every variety of weed imaginable. With a nearby constant supply of weed seeds it was akin to "lake effect snow". Adding to the weeds are our very own oak trees that have riddled our yards (both front and back) with acorns that are like land mines to the bare foot. 

Here is a sneak peak from across the fence


Hence we decided this winter to learn from our mistakes of years past and put down a thick layer of [wood chips/twigs/leaves/mulch] on top of any exposed non-planted soil in our yard ensuring to leave a buffer zone around the main stem/trunk of plants and trees. This did the trick and the number of weeds we had to take care of this spring was a fraction of what we were left to deal with in the previous years. In addition to keeping things down, even the few that grew were a breeze to remove from among the wood chips.

If you are looking for free wood chips then contact your neighborhood tree service and they will be more than happy to deliver a truck load. Just watch out for too much eucalyptus or pine tree chippings as they can really make your soil acidic. For folks in the San Francisco Bay area (mainly the south bay and peninsula) we highly recommend Jose Tree Service who did a great job with our oak trees and provided us with plenty of wood chips when asked.

We are hoping to continue this effort for most of our yard. However, its a losing battle in our front lawn as the weeds are tightly interwoven with the grass and we lose a bit of the grass with every attempt to pull them out. We may resort to a general purpose weed prevention chemical, but would really prefer not to go that route. If my fellow green thumbs have any suggestions of an organic way to get rid of the weeds I am all ears!

Tuesday, April 5, 2011

More use for broken concrete

We had some small pieces of concrete that was left over from our retaining wall project.

We have now put them to use....


They help keep the wood chips away from the base of our fruit trees and also lend a rustic appeal

Making the Luffa Gourds usable


Read about my attempt to grow the Luffa gourd in my 2010 garden...here

Here is what I harvested from my plants in the fall of 2010.

These are some of the nicer looking gourds


And the not so nice ones with some dry moldy discoloration


Now that the heat is picking up, I am off to clean these up with a dilute solution of bleach and water and set them out to dry in the sun.


Borage

One of the most tantalizing flowers in our 2010 vegetable garden was Borage.


They attracted lots of pollinators and the flower was always the center of a lot of activity.


We pulled out most parts of the plant because I made the mistake of planting them in our vegetable beds. They grow to monstrous proportions and were making it difficult to harvest the Eggplants that were in the same bed.

Now in Spring I see that they have voluntarily re-seeded in the same beds and also spread themselves to nearby areas.