Search This Blog

Showing posts with label Then and Now. Show all posts

Monday, March 12, 2012

A new fence


We finally have a brand new fence on the south side of our property. I have come to the realisation that it is actually good to have the 6 foot fence, and here is why.

The neighbors side is the one where you cant see the difference between where the lawn ends and where the weeds begin. We also saw dog poop littered all over the frontyard.......ewwwww (Remember the unruly dog that charged at me more than a few times and is always outside in the yard).


We also saw that he had a plethora of boxes along the side and guess what- they were rabbits and chickens. We later heard that he was offering the rabbits for free to the guys who were there putting up the fence.


One can see the stumps of the many vines that literally held up the fence, when they were taken down, along came the old fence. The alpha male creature (it is a shame to even call it a dog) going at it all the time didn't help much either.

As the fence came off, it took down the section that held the gates for most part. So we now have new gates too ! But not without its share of drama.


The post that holds up the gate (above picture with the new frame) is right along where the water main line runs on its way to the house. Of course the guys broke the water main when they were digging out the old concrete (I don't blame them for breaking it. But it took them a while to realize it was the main and call for our help to shut it off....cant imagine how bad the water bill will be now)


After patching things up, they put down a box to hold up the cement that was going to be poured for the new METAL posts (no more sagging gates)


Even though the bank balance took quite some beating, I now feel a lot safer to venture out into the yard.

Now for some after pictures


Neat huh?


Thursday, February 23, 2012

More raised beds

You would think we are crazy to be building more planter beds. Well, maybe we are !

Four massive 12*3 foot beds are replacing 3 of the Gen1 raised beds we had here and expanding the planting area.


It is proving to be a really massive project. Just leveling the boxes took almost a full day. Then the hardware cloth that had to be custom fit took away another entire day. We still have not gotten to filling up these boxes with our miracle soil+compost combo, which we assume will take 2 full days for our trusted garden handyman Anthonio.


This has also become a pretty expensive project with the lumber costing over $300, the 10 cubic yards of compost costing around $300 as well, the hardware cloth, the lag screws and the rest adding up to around $500 and the many days of labor. Now there goes the budget for a Hawaii vacation !

Good neighbours make good fences

A piece of news from the San Mateo county caught my attention (link). Over the past couple of months we have been involved in a futile argument about the fence we share.


The  newer fence you see is the one in question and is our neighbor's front yard fence. Our city fence guidelines mandate a 4 foot fence in the front yard and for the first 15 feet on the side yard.

We pointed that out to them, but without the least bit of care that it violates city guidelines, they went ahead and put up the 6 foot structure. As much as I support privacy because we are on a main street, the blatant violation bothers me because we are now forced to match his 6foot fence on the common side we share. But we have decided to sit tight and not complain to the city (after a lot of thought and discussion and considering that we don't want to pay for the fence all by ourselves).

The next post will be all about the new fence, just have not gotten around to  taking pictures.

Monday, October 31, 2011

A new herb garden bed


It has been a while since new posts were updated in a timely fashion. The summer of 2011 has been pretty hard on us. Many a times we forgot to take pictures, and in the off chance that we did, the picture never got downloaded from the camera for many months.

Here is one such update about our new "herb bed". (Read the Prologue to this story here). We added a nice seating area and some finish trim to the herb planter bed.


Thursday, June 23, 2011

The Siding project

The south side of our yard was filled with an array of shed like structures that you see in this picture.


We took out these termite infested structures when we did the pool demo. The part of the exterior wall never ended up getting its vinyl facelift for over two years.


We finally got around to fixing the sore spot


And here is the finished project


Thursday, June 16, 2011

The next recycled concrete retaining wall


In the fall of 2010 we envisioned a project to use recycled concrete to shore up the back fence that had a grade difference with our neighbors. This is where we started off (read here).

You can see the difference in grade in this picture


We completed that wall in the spring of 2011, and used up pretty much all the concrete we had hauled from almost 25 miles away from home in multiple trips.Filling it up took a lot of soil and compost, and needless to say time. (read here)

This is how it looks now


Ever since, we have been scouring Craig's list for any listings that had at least some decent looking concrete pieces. It turned out to be either too far, or ones broken up pretty badly.

Just a couple of days back during my drive to work I spotted a demo crew down our street tearing up an old house that was sold recently. I figured the driveways were going to be taken apart as well. We spoke to the guy doing the demo, quickly rented a pick up truck form the U-Haul down the road and bagged these beauties. This batch is much nicer than the ones we picked up the first time around. Bigger beefier pieces that have been broken into even pieces and they are also stained a light tint of green.


Our reliable "garden help" helped haul it in during the week and has been working on getting the wall up over the last couple of days.


Looks like I might get rid of all the soil (piled up behind the concrete pieces here) and compost piles I have had sitting around for this project.


Planting for Privacy-Part 2


The first part of our winter Jasmine story is here.


Next it was time for the engineer to get busy building an enticing and supportive trellis for the jasmines to hold onto and spread their wings. 


This was our canvas


But, I was taken aback by the final design that Guru came up with. It appears to have taken into consideration the 15 year load from the vine and a 50 year wind gust resulting in the strongest jasmine trellis known to man!! 


I just hope the Jasmines love the trellis as much as the engineer does.


The Strawberry update


We picked up 3 strawberry plants last year (sometime in spring...2010). They were put in a dedicated planter bed, and I even covered the top layer with red plastic sheet. (I had read somewhere that it helped Strawberries and even tomatoes ripen well and absorb the reflected red light). Read about our 2010 story here.

The Strawberries did pretty well for the most part. We harvested close to 3 lbs of strawberries throughout spring and summer (I guess they are the ever-bearing type. I don't know what variety they are, now that the plastic pot it came in is long gone. It was an impulse buy at a big box store, with no research.)

In the winter of 2010 the soil/ compost in our Strawberry bed magically started going down (as you can see below) and the berries that were coming up were submerged in puddles of water and rotting away. We lost quite a lot of them this way and the weather was getting cold for us to fix it soon enough.


Now that we have had the time to think about it over the winter months, we came up with this idea of planting the Strawberries in 5 gallon pots (with the bottom removed) and raising them above the overall soil level on the bed.

We got that done almost a month or two back...and here is how it looks now.


I am all excited with the Strawberry season already getting started. I have some wee little Strawberries coming out as well.


Thursday, April 21, 2011

Planting for Privacy-Part 1


We have transformed our front yard considerably in the last 3 years. Read about the first few stages of transformation here. (Follow the other articles with the "Front yard" label to walk along time)What started of as a dense overgrown brush area has really been transformed into a nice little rose garden. Living on one of the busiest streets in the area poses a lot of challenges. One of the things we have struggled with, is to bring in some much needed privacy in the front yard for sight and sound proofing.


The simplest solution was to build our fence tall enough but the city wouldn't let us do it for "consistency" and "safety" purposes. Driving around our neighborhood I saw a lot of houses with Oleander bushes and Red Tip Photonias that appear to have been plucked straight out of the "Giant's Island" from Gulliver's travels. This got me thinking if I could sneak through the height requirement by erecting a green fence.


The front of our property faces east on a rectangular lot and the main attraction are our 4 giant live oak trees which I am really proud of. However, putting down any plant under these oak trees along the fence would require direct irrigation in the drip line of the oaks which according to many a tree guru is a big NO NO. After much thought and reluctance we decided to go with "Oak friendly" Oleanders for most of the front yard. You can read more about our attempt here. Our strategy has been to tell them to "Go Fish" for water but it isn't working well. Its time to give them some drip irrigation at least for the next year or two until they establish themselves.


Towards the north-east corner of the property, we get a good amount of afternoon sun, where we have a majority of our roses planted alongside that fence-line. In the same area, between the roses, right up against the fence, I tried sowing some seeds of the Cathedral Bells, The Black Eyed Susan vine and Passion Fruit last year. Even the ones that emerged were promptly killed by the frost.


As I was wondering what to do little did I realize that the answer was right in front of my eyes. In late fall we saw this lovely winter Jasmine plant at Costco and picked it up. It was planted into one of our ceramic planters right outside our front door and has almost doubled in size in the last 6 months (a lot of it during winter). Add to it the fact that it is evergreen, I decided that it would be my choice of flowering vine in the front yard. Plus this complements well with the roses since this would provide fragrance in late winter early spring and the roses during late spring, summer and fall. The flowers are so fragrant and delicate...


So this year, as soon as i saw these Winter Jasmines at Costco, I pounced on them again and got 6 more home. Immediately, last weekend we got them into the ground right up against the fence.


Going by the growth in the first jasmine (the corner one in the photo above), in a few years the coverage should be pretty dense. However, they may need a bit of direction once in a while by some careful wrapping of the new shoots. If you have suggestions for other such trellising vines that remain evergreen and would give good coverage, please do let me know.

More pictures on the trellis project are coming up shortly.

Wednesday, April 20, 2011

The making of a herb garden

One of my visions has been to convert our Camellia territory (read about the move here) into a herb garden. The space is about 12 ft long and about 4 ft wide.


I had saved up these pieces when the new fence on the north side was being installed. The fence installers were going to just dump these into the trash.


We still needed to spend some dough to get the other supplies for the planter bed.

The first part i.e. the frame was built with 2x4 's attached to 4x4 posts with some long galvanized lag screws.


We then nailed the recycled fence board pieces onto the structure with the nail gun, and 1 1/4 finish nails.


Now that the bed is up and ready, we have been thinking of adding a top trim onto the box. A 2x4 trim on all 3 sides and a 2x12 trim on the side that is closer to the patio with some supports nailed to the 4x4 posts. This will function like a bench area where one can sit down and tend to the herbs.

Thursday, April 14, 2011

Mistakes....

I have been looking through my pictures trying to get them all in one place and organize them.

Looking back now, I realize all the mistakes we made in the last couple of years.

An 8 ft trellis for a Bean-Bush (read your seed packets)


Over planting Squashes (Almost 30 squash plants and we got a harvest of about 5)


Fresh wood chips on a tomato that was planted in a container (no wonder our plant was yellowing and didn't produce much fruit)


We have come a long way and I am happy to learn something new every year.

Mulching

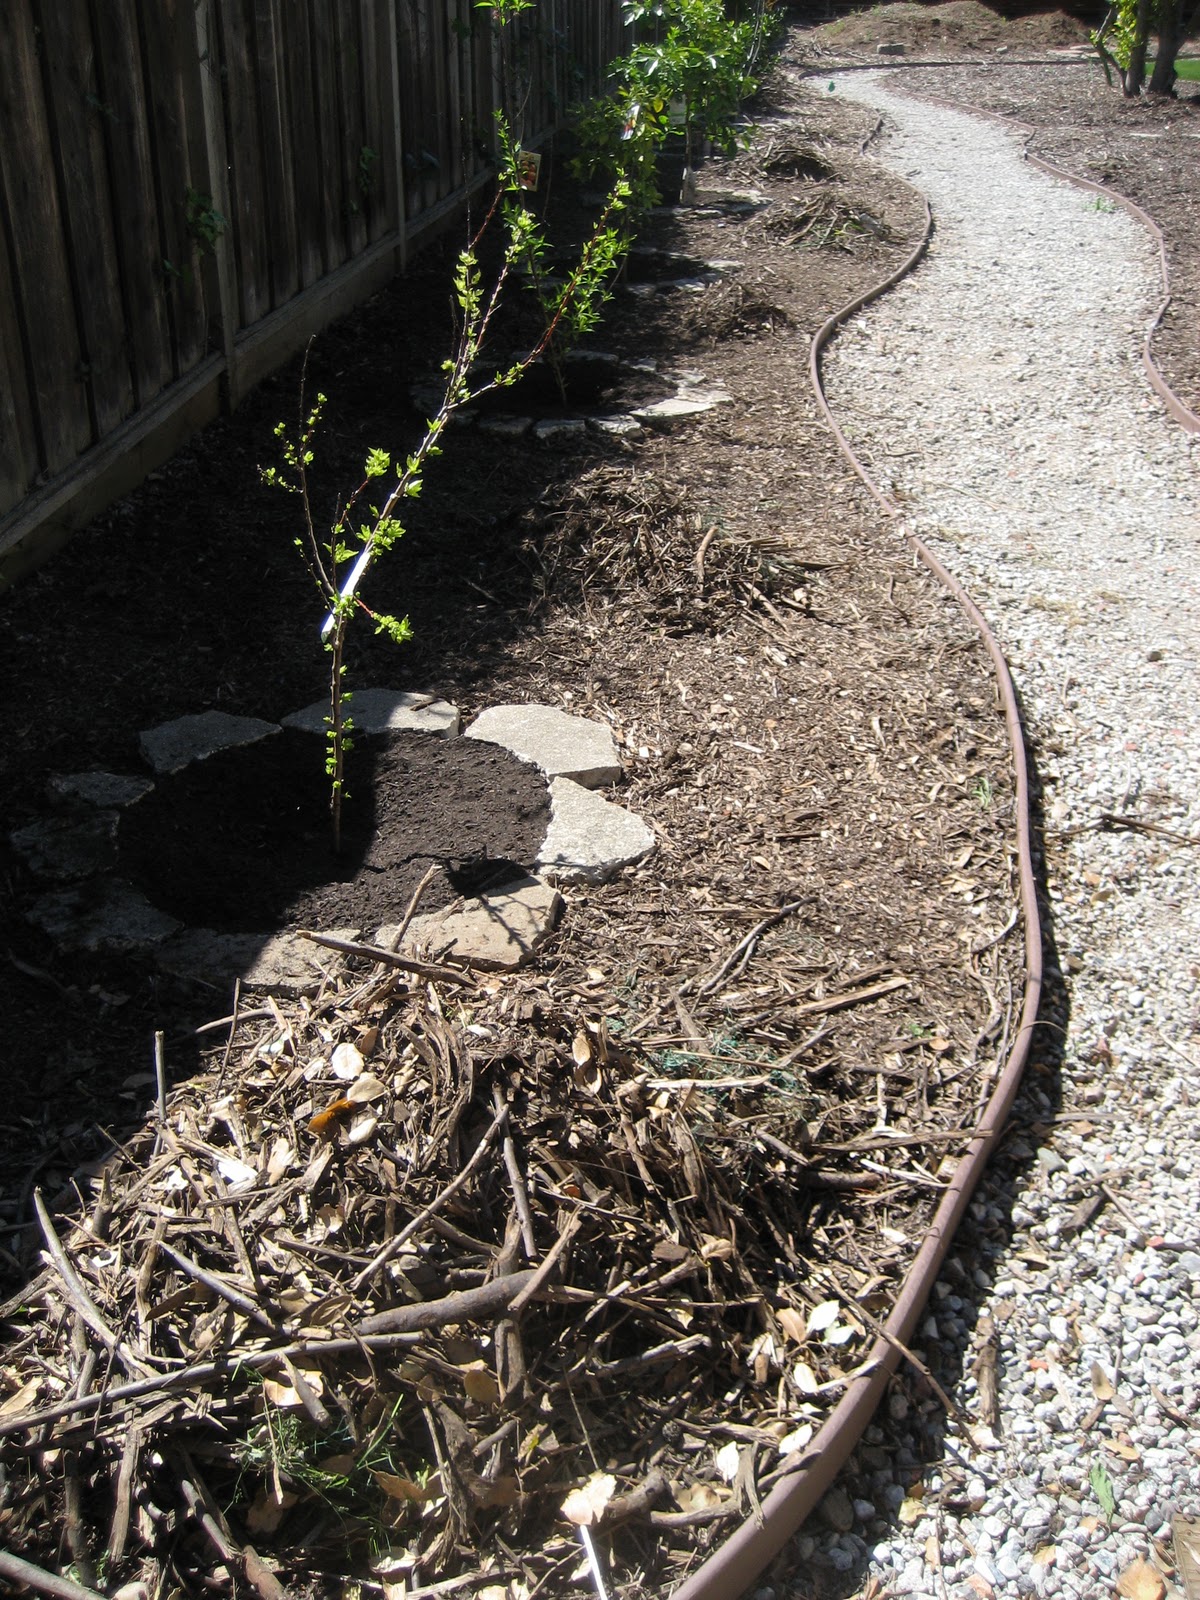
In 2010 we had our friendly tree pruner deliver a couple of loads of wood chips to help us keep the weeds down. This was one of our first loads of wood chips.


We spread them around the yard, mainly the areas where we had nothing growing, and around our raised planter beds. They made a BIG difference. During the winter of 2009 we had serious issues with weeds popping up everywhere.

Now that we are working on adding more plants in the garden (maybe even flowers.....flowers from seeds), we have been working on removing the twigs that were a big part of the wood chips that got delivered. Since it was free stuff, I did not complain about the pieces being uneven. But now it means we have to get them all out.


It has been an extremely arduous task to say the least. We have close to 2 cu yards of decent sized twigs that are now piled up on the driveway waiting to be disposed. Maybe the next time around we should just order some mulch from our garden center and spare us the trouble of having to go through this clean up exercise.


Wednesday, April 13, 2011

The Camellias

This past weekend we worked on a project that has been on my wish list ever since we bought the house in April 2008.


Each of the Camellias are unique and bear very pretty flowers. Here are some


This is a picture from fall of 2008 when the pool demolition was in progress


We finally managed to dig out these Camellias and move them closer to the back fence. And now i am keeping my fingers crossed, and praying that they make it.


I haven't pruned them as yet, and hopefully they will all survive and take well to the new surroundings.


Friday, April 8, 2011

Nature writes. Gardeners edit.


Taking a drive around our neighborhood you see these beautiful front yards and pavements lined with pretty yellow flowers. Draw close and you realize its the same weed that has been tormenting us by growing all over our yard. Below is a photo of it. Granted that this isn't like its ugly cousins with thorns and unsightly blooms but it slowly but surely takes over your yard. The one saving grace is that procrastination helps just a little as their yellow blooms are indeed pretty to look at.


I read somewhere that to be "certified" organic for a vegetable patch, there has to be a chemical free buffer zone around your garden for 50 yards all around. Keeping this in mind we have been trying hard not to use any chemical methods (Roundup, etc.) and just do it the organic way, i.e. pull them out one by one. Doing this every day does help me take my mind off other things and is a great stress reliever. Not sure if my fellow gardeners feel the same. 

Over the past few years I have come to know my weeds quite well and even smile at  recognizing some of them along the free way during my commute to and from work. These are usually at least 5 feet tall, making me wonder if mine would be the same had I let them grow. 

I sometimes wish that Caltrans and city community works departments realize what they are doing. I find that the weeds are allowed to grow as much as they want through the entire wet season and flower and set seed. At this point they are asking to be disturbed so they can launch their seeds into the wind. Precisely at this time all community departments realize that the weeds are no longer adding to the beauty of the landscape and decide to come over with a large scale weeder on a tractor and take care of business: for the weed that is, sending them everywhere. Maybe I am the one who does not understand the plan. Maybe this is their cheaper alternative for green landscaping for 4 months of the year.

Our approach to weed management for the most part follows the age old saying "Prevention is better than cure". We were left with no other alternative as our neighbor decided to neglect his $$$$ yard (with sod and ornamentals) and let it become a test garden for every variety of weed imaginable. With a nearby constant supply of weed seeds it was akin to "lake effect snow". Adding to the weeds are our very own oak trees that have riddled our yards (both front and back) with acorns that are like land mines to the bare foot. 

Here is a sneak peak from across the fence


Hence we decided this winter to learn from our mistakes of years past and put down a thick layer of [wood chips/twigs/leaves/mulch] on top of any exposed non-planted soil in our yard ensuring to leave a buffer zone around the main stem/trunk of plants and trees. This did the trick and the number of weeds we had to take care of this spring was a fraction of what we were left to deal with in the previous years. In addition to keeping things down, even the few that grew were a breeze to remove from among the wood chips.

If you are looking for free wood chips then contact your neighborhood tree service and they will be more than happy to deliver a truck load. Just watch out for too much eucalyptus or pine tree chippings as they can really make your soil acidic. For folks in the San Francisco Bay area (mainly the south bay and peninsula) we highly recommend Jose Tree Service who did a great job with our oak trees and provided us with plenty of wood chips when asked.

We are hoping to continue this effort for most of our yard. However, its a losing battle in our front lawn as the weeds are tightly interwoven with the grass and we lose a bit of the grass with every attempt to pull them out. We may resort to a general purpose weed prevention chemical, but would really prefer not to go that route. If my fellow green thumbs have any suggestions of an organic way to get rid of the weeds I am all ears!