Search This Blog

Showing posts with label Vegetable Garden-2011. Show all posts

Wednesday, April 18, 2012

A headstart to 2012

When I talk to people (mostly Indian) that have no idea about gardening, the most common question is "do you have to start from scratch each year?". I am assuming that tomato plants in tropical climates never die like they do here in winter, and hence the question.

It has had me thinking for a while and thanks to the very mild winter in 2011, I actually did one such experiment. As you can see in the picture below, my Eggplants continued to survive in the raised beds in February.


I also dug out some of y pepper plants that i could not protect in the planter beds and kept them in the porch.


Now that the weather has started to warm up, I put them back into the raised planter beds. They seem to be thriving well. Hopefully they have a decent head start into the season and I have some yummy eggplants and peppers in spring.


Monday, March 12, 2012

Firewood rack


This was one of the last minute DIY projects in the Fall of 2011. It got bundled up in tarp right away and seems to be holding up very well.

The firewood is off the ground, leaving no room for those damn rodents, and all those leftover pieces of lumber that the resident packrat has been holding is also put to good use. I am a happy camper.

Thursday, February 23, 2012

Our very own Chupacabra

We have had a long tumultuous history with animals of all kinds in this house. Over the years, it has gotten more and more challenging.

Summer of 2011, we had to deal with mysterious cracks in the ground. These ruined the look of the landscape, but was not causing much trouble.


A couple of props were added to the landscape, knowing fully well that they wouldn't be helpful ;). But a girls got to have her retail therapy.


Then came the attack on the vegetables. This we suspect was the squirrels that had inhabited this place all along but had mysteriously developed a love for vegetables.


Then some nasty things started happening over the fall. Squirrels (or racoons) started chewing up our drip irrigation heads and the elbows in random spots. We ended up with 350$ water bills and the slugs having a party !


But the worst was yet to come. Over the winter of 2011 the cracks in the garden became more rampant, the soil would just cave in beneath your foot and the mounds started appearing everywhere


We are still trying to do damage control and figure out a longer term fix to this issue


The indoor Chayote story


Sometime in October 2011, our trusted garden handyman Anthonio brought us a couple of Chayote Squashes he grew in his garden. These were not edible, i.e they had over matured and had extremely long thorns. I decided that they would be a good choice to hold on to and grow in our yard. So they sat by the fireplace all along and have grown to over 6 ft in length with tendrils and what not.

Another couple of weeks and I will put them out in the garden. Apparently the plant dies in winter (like all plants do) but automatically comes back to life in Spring. Wouldn't anyone love a low maintenance plant like this !

Friday, November 18, 2011

Getting ready for winter

The past couple of weeks we got our garden ready for winter and all the weeds. Our yard has been riddled with weeds of all kinds. Slowly we have been trying to eliminate them (most importantly without the use of any chemicals).

Every year we have been covering unused areas with weed fabric or newsprint and a few inches of wood chips. (Read about our experience with Oak mulch here).

 Some of the woodchips we put down in 2008 have already started to decompose really well and are turning into organic matter. I now see weeds growing in them. I am not quite sure how I should deal with this. Add more woodchips on top maybe? or should I first remove the decomposed matter and them add new chips?

In areas (where I intend to plant this summer) I have not put down any weed fabric. Just a nice thick layer of woodchips.

Now that this big task is done...I can rest easy knowing that weeds wont take over my wonderland.


Friday, November 11, 2011

From the summer of 2011

This was very early on in the summer, because after the vegetables started coming in, there was no more time for pictures of the garden.


This picture now adorns my desktop, reminding me how far we have come.


Tuesday, November 8, 2011

Brrrrrrrr......it is cold

The cold weather has set in almost everywhere in the US, and even in sunny California. We have been busy getting the garden ready for winter.

This is our first attempt at setting up winter protection. The past few years, we have either left the plants to fend for themselves and die in the process. We also housed a lot of the precious ones in pots that were moved indoors.

The precious plants were put inside the ground this winter, to give them the nutrition and the space to grow. So we had to built some protective cover for them.

This is the biggest structure, and it protects 5 Drumstick plants that I carefully grew from seeds (read it here and here)


This protects the Malaysian Guava that died every winter but has successfully managed to come back.


The most treasured possession i.e. my curry leaf plant looks lush in this picture. We pruned it well (with just a few sprigs to spare) and covered it p with some shade fabric and Burlap cloth as with the rest.


The foliage on this plant does not seem like much but the pruning yielded us at least a pound and a half of curry leaves (which is quite a lot, and should last me all winter)


The Loofahs are here

I finally managed to clean up and dry the Loofah Gourds I grew last year. (Read here)

This has been a task waiting to be done since the spring of 2011. This ended up being ZBB'd.

ZBB'd is a jargon (among a million others) that is often used at the new place I have joined and just to get a hang of them I have been using them everywhere. It just means that it is a low priority item and there are other tasks that are higher priority that need to be addressed first.

Now that the year's quota of sunshine was quickly running out, it was time i got these cleaned up. Almost half my Loofahs had some kind of dark discoloration and needed some cleaning. I skinned them and dunked them in a solution of baking soda and bleach mixed in water. After an hour of soaking they were rinsed out separately and left to dry.


Monday, October 31, 2011

First foray into canning

2011 marked our first foray into the world of canning. The scare of "botulism" has kept us away all this while. After reading up a lot on the topic we figured it was the right thing to do considering we grow our own Tomatoes and would much rather place our trust on home canned stuff (the right way) instead of the pricey, store bought, sodium laden, BPA laden canned tomatoes.

I picked up a pressure canner because I knew that my prime target was Tomatoes and because of their low acidity, it wont be safe to put them through a simple boiling water canner. I also made sure I got all the tools, and they were well worth the investment and make the entire process much more easier to manage.


We made sure we stuck to all the rules and requirements, boiling sanitizing and careful handling. (Reminded me of the days I helped my mom make Jams and Juices, growing up in India)


This was one of our first batches


So we were very motivated to skin the Tomatoes (as it was suggested in the books)


My favorite are the yellow Brandywines which were extremely sweet.


It was a lot of work, and yes it was the middle of the night by the time they got into the canner.


We had pretty good success rates with the seals, but we forgot to add vinegar in the water (hence the water stains on some of the Quart bottles). But hey it is just cosmetic.

The bigger Quart bottles contain either whole or pureed Tomatoes. (I have about 21 of them stocked up now). Hopefully they will last me all winter.


The smaller half pints have Tomato pickle (seasoned with sesame oil and Indian spices). The green colored ones are Tomatillo Salsa (Seasoned with homegrown green chili peppers).


Curry Leaf propagation experiment

The small bunch of regular readers of my blog know about the "Curry Leaf" plant that is my prized possession. (Read about it here, here and here)

This is the first year that our "Curry Leaf" plant is in the ground. For those skeptics who are against putting them into the soil, I know I am taking a big risk this winter. The plant is still fairly small and would need a nice protective jacket to help it get through winter. (We are working on that)

This is also the first year that our little plant yielded some fruits. The key is to have the freshest fruits to ensure good success rates for the propagation. We sowed the healthiest of the lot in flat trays so they can be moved inside. The only tricky part is that it is winter and I have serious doubts about their viability.


Stay tuned.

A new herb garden bed


It has been a while since new posts were updated in a timely fashion. The summer of 2011 has been pretty hard on us. Many a times we forgot to take pictures, and in the off chance that we did, the picture never got downloaded from the camera for many months.

Here is one such update about our new "herb bed". (Read the Prologue to this story here). We added a nice seating area and some finish trim to the herb planter bed.


Wednesday, October 19, 2011

Exotic Gourds

The past couple of years, I have had a pretty bad time growing exotic asian gourds. The only exotic gourd I manged to grow was the Luffa Gourd in 2010 (Read those posts here)

I don't give up easy, so in 2011 I pledged to grow these exotic asian gourds yet again. But this time around I succeeded, but it has been bitter sweet.

The gourds I tried were- Bitter gourd (Indian and Chinese), Snake Gourd, Ridge Gourd and Bottle Gourd.

I have had great luck with the Bitter Gourds this year, too much good luck actually. I grew two varieties, the one on the left are what i call "Chinese Bitter Melon" as those are the ones I find in the local Ranch99. The ones on the right are the Indian variety (the ones I ate growing up in India and they are available at the local Indian grocery stores.

As much as one might be obsessed over Bitter Gourds, it is difficult to consume a lot of these. So I shared the bounty with the extended "Namakkal clan" and my Asian colleagues


Snake Gourds are a precious commodity here in the US, and I hear even in India these days. One typically finds the fat variety in the store. We gladly consumed all those lovely Snake Gourds (and shared some with friends too).


The Ridge Gourds though fairly common sight at the local indian grocer, the store bought ones look pretty worn out and tired (like me). My homegrown Ridge Gourds were very tender and kept well for over 3 weeks in the refrigerator even after harvesting. I made a couple of classic dishes and a few new ones. Need I say more- the Ridge Gourds were a grand success.


The Bottle Gourds are some of the most easiest to grow and the plants typically take over the planting area and the surrounding places too. They are typically shaped like bottles, i.e. cylindrical. My Gourds this year turned up in this shape instead and made for some cutesy gifts.


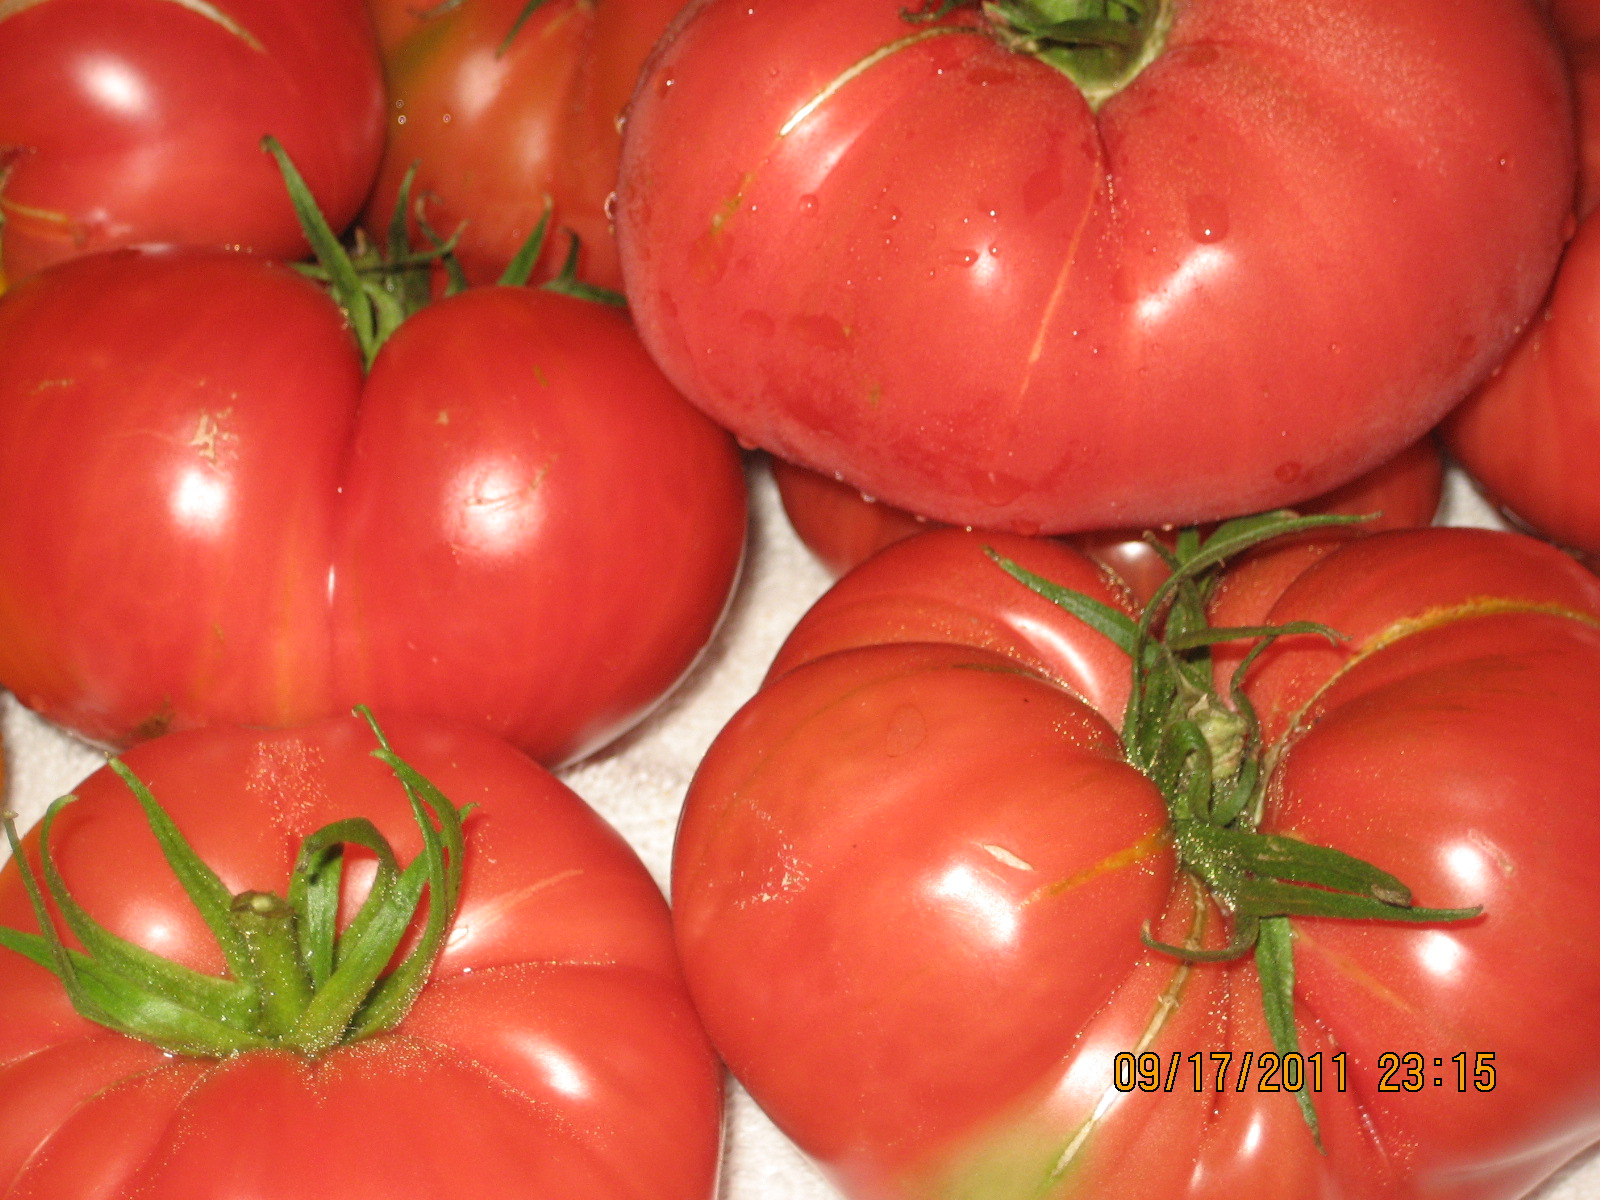
The Tomatoes of 2011


Here are the lovely Tomatoes i grew in 2011. The few Brandywines that didn't succumb to blossom end rot ended up ripening into the most sugary sweet Tomatoes of the year


The second best award went to the "Black from Tula" Tomato.


The Razzleberry Hybrid was the most firm and well rounded Tomato


The "Cream Sausage" were the most prolific


The "Red Siberian" had the most lovely Calyx


The "Prudence Purple" was a gorgeous and beefy pinkish red Tomato


And one of the entire bounty


Friday, September 16, 2011

The crazy month that is September

I haven't had time to get to the blog this month. New jobs for both of us, unplanned trips, and all this has to happen smack in the middle of harvest season.

Well, and I was thinking that we had scaled back this year, but it does not look like it at this point. Here is a sneak peek of what we have been dealing with.

This was all in a day and we did not have time to get to the Ridge Gourds and the Snake Gourds.


Thursday, September 8, 2011

Blossom End Rot

WARNING.....some really disturbing images to follow and surely not for those with weak hearts.

Blosom End Rot that seems to be affecting almost every fruit on this Tomato plant


These are all from the same plant....the Brandywine

Monday, August 8, 2011

Potager 2011

Here are some pictures from a Potager in progress

Colourful Nasturtiums


The two Calendula varieties


The second Calendula variety


The Calendula's are growing along our Strawberry area and near the Tomatoes that has helped bring the bees to the Tomato flowers


The Chrysanthemum that is growing through the massive Zucchini monster